
Why AI Tracks Sound Cheap — and How to Fix It
Listeners from 8 to 80 spot an AI track in seconds. Here's the deep fix: stems, real drums, MIDI bass, vocal surgery and depth — with screenshots from my own sessions.
Here's an uncomfortable experiment: play a raw Suno export to anyone — your kid, your grandmother, a random person on the bus. Most of them will clock it as "one of those AI songs" within seconds. Not because they're audio snobs; most of them couldn't tell a compressor from a coffee grinder. They hear it because some things simply aren't in the file — and the human ear is annoyingly good at noticing absence.
In the previous article we mastered a Suno track for Spotify, and I warned you honestly: sometimes mastering can't save it. Today is the sequel — we open the track up, take it apart and rebuild the weak organs. Surgery, not cosmetics. Everything below is from my actual sessions, screenshots included.

Made a track in Suno? I'll finish it to release quality — from $39.
Why Mastering Alone Can't Fix It
Mastering works on the finished stereo file. It can rebalance, tighten, brighten and loudify — but it cannot invent a kick transient that was never generated. An EQ boost at 18 kHz where the generator stopped rendering doesn't create 'air'; it creates louder nothing.
Last time I compared mastering a weak generation to polishing a car with a broken engine. This article is the engine repair. If you haven't read part one, start there — half of all problems are fixed at the mastering stage, cheaply. But if your properly mastered track still sounds like a plastic demo next to a commercial release — welcome to deep restoration.
What 'Cheap' Actually Sounds Like
Diffusion models don't record instruments — they paint one big picture of the whole mix at once. Where elements overlap, they eat each other. That's why every raw generation shares the same four tells:
A kick with no punch. Especially under the vocal — wherever the voice is present, the top of the kick gets eaten. The beat feels soft even when the meter says it's loud.
A bass that mumbles. Filtered, woolly, no note definition. Often it's technically a double bass that sounds like it's playing through a pillow.
Hi-hats made of fizz. Snotty resonances around 2–4 kHz, and above ~18 kHz — silence. The 'air' of a real recording was simply never generated.
One baked-in reverb over everything. The whole track swims in a single space you can't turn off — somehow washed-out and lifeless at the same time.
The better the playback system, the louder these problems shout. And here's the strategic insight that shapes the whole plan: drums are the widest-band instrument in the mix — kick in the lows, snare in the mids, cymbals on top. Replace the drums with real ones and you mask most of the artifacts across the entire spectrum in one move. That's why we start there.
Step 1: Split the Track into Stems
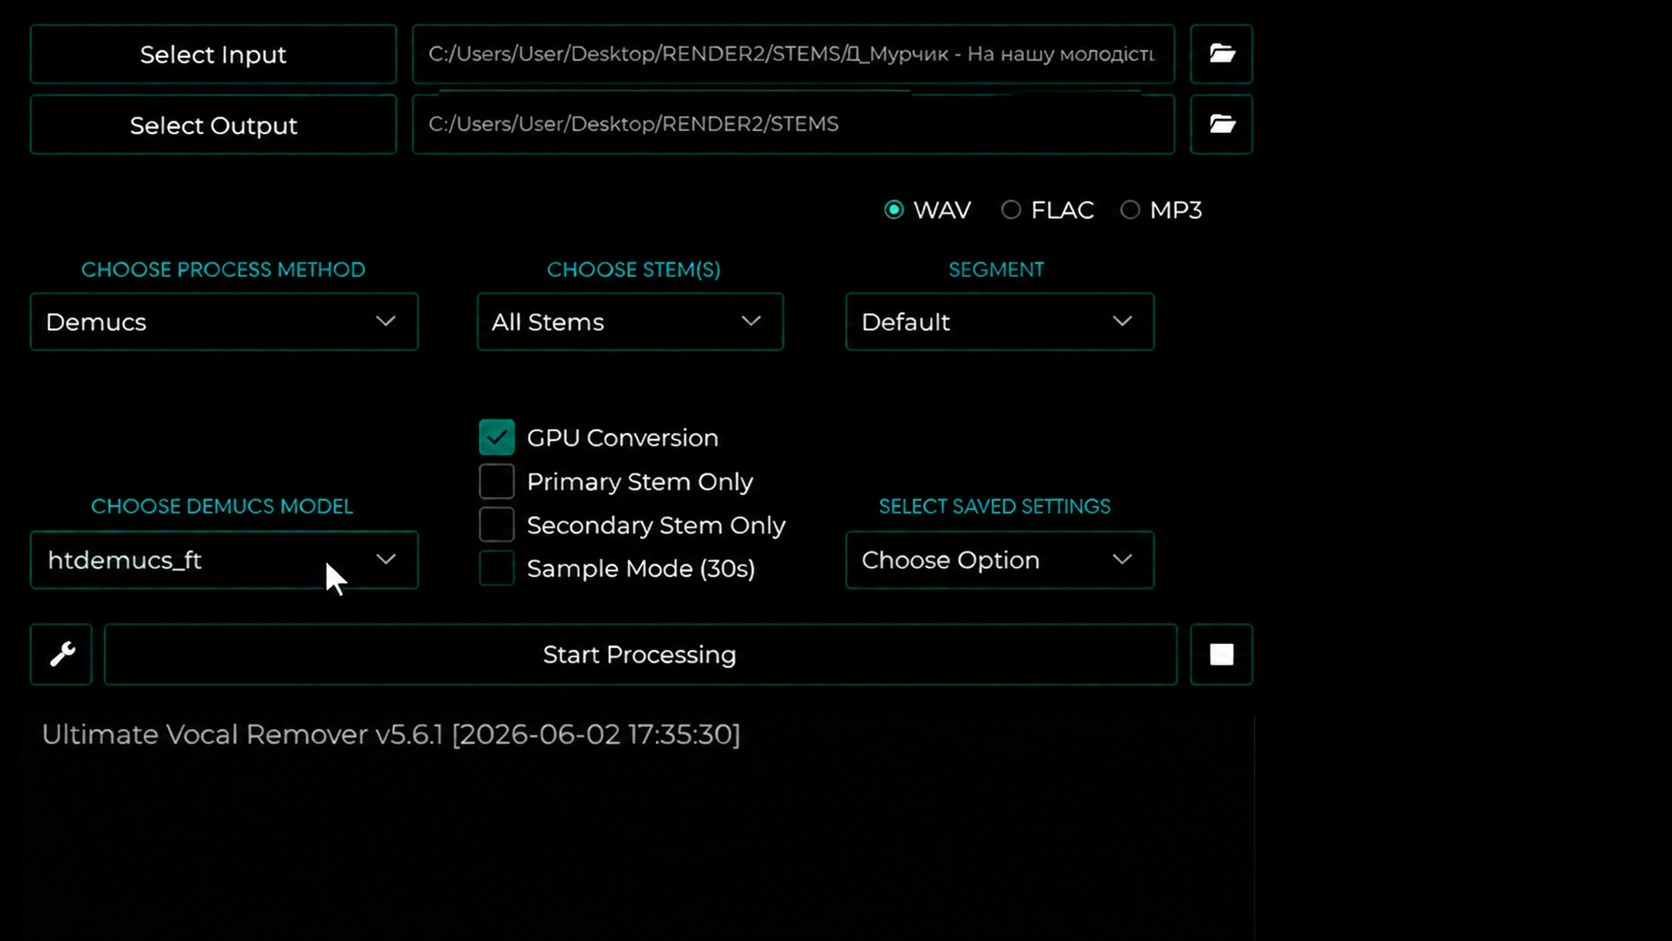
First, the track needs to become tracks. The free tool for the job is UVR5 (Ultimate Vocal Remover). Drop your file in, choose Demucs as the process method — and don't settle for the default models. Open the dropdown, hit Download More Models, and in the Download Center grab htdemucs_ft — Meta's fine-tuned model, noticeably cleaner than the stock ones. Select All Stems, press Start Processing:
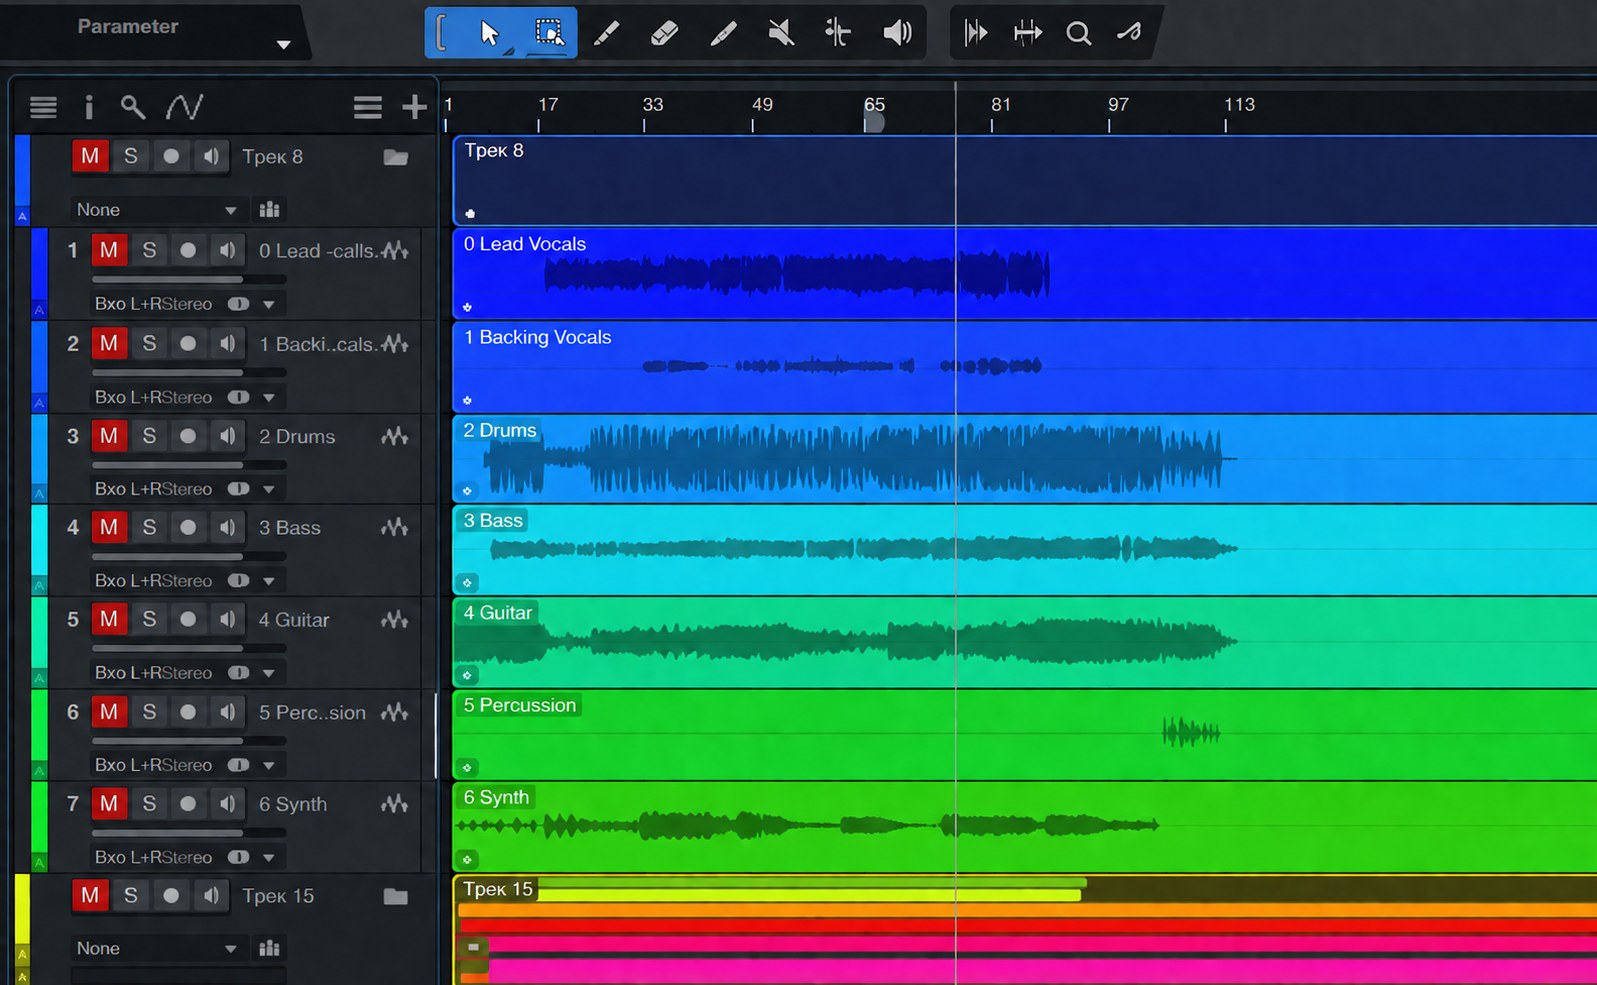
Out come four stems: vocals, drums, bass and everything else. For drum replacement you'll want to go one level deeper and split the drum stem into kick, snare, hats and cymbals — rebitapp.com does this automatically. Here's what a fully split session looks like in my Studio One:
Pro Tip
Separation algorithms love filing saxophones, violins and trumpets under 'vocals'. Audition every stem before you trust the label — anything misfiled goes to the instruments group. Name and color your tracks right away; five boring minutes now saves an hour of 'wait, what is Track 14' later.
Step 2: Replace the Drums
The kick goes first. A trigger plugin — apTrigga 3 in my case, SPL DrumXchanger works too — listens to the kick stem, detects every hit and fires a clean sample in exactly the same spots. The AI kick with its eaten transient gets replaced by a real one, and the groove doesn't move a millisecond:
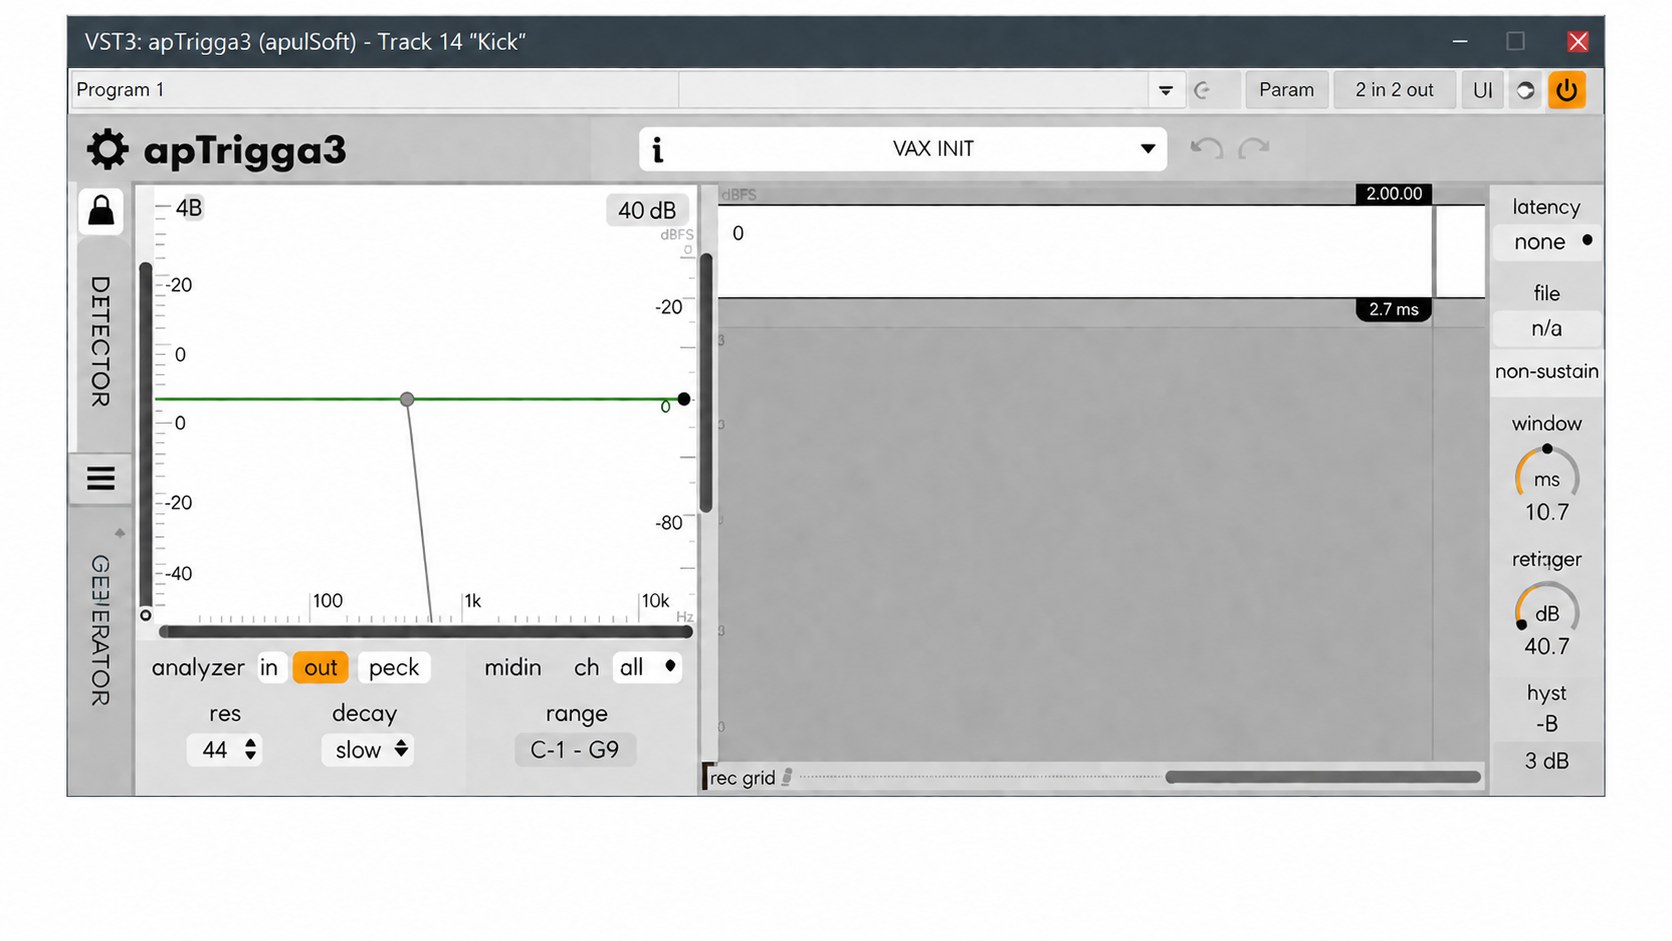
Two settings decide whether it sounds natural. Pick a sample close to the original — you're upgrading the kick, not swapping genres. And dial the dynamics down to 40–50%, so quiet ghost hits stay quiet and the performance keeps breathing. The snare: same operation, second verse.
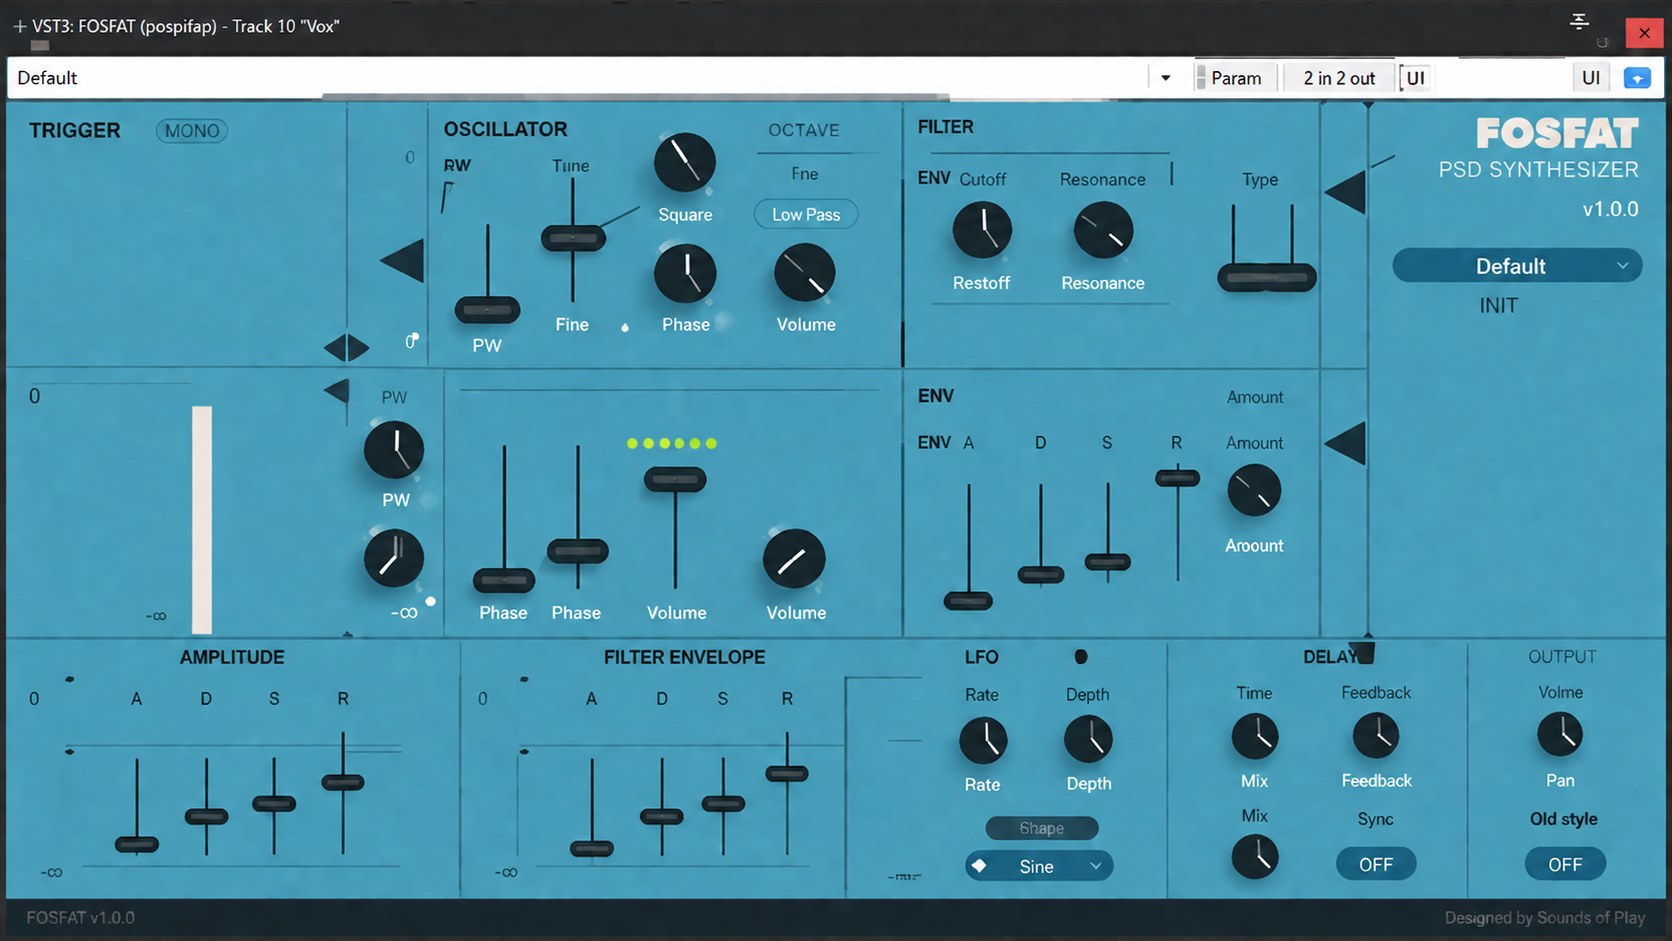
Hi-hats are the biggest snitch in any AI track. Two roads here. If the part itself is decent, you can rebuild the missing top end by layering white noise onto each hit — a detector-synth like Klevgrand Fosfat tracks the hats and adds a precisely shaped noise burst on top. The 'air' that was never generated gets built from scratch:
If the part is hopeless — snotty, smeared, rhythmically drunk — don't resuscitate it. Replay it in any drum sampler with humanized velocities. It takes ten minutes and usually sounds better than the original ever did.
Pro Tip
A quiet vinyl-noise layer over the drum bus (RC-20 style) is a double agent: it adds vintage character and masks the small leftover artifacts. Engineers were using this trick decades before anyone said the word 'diffusion model'.
Made a track in Suno? I'll finish it to release quality — from $39.
Step 3: Rebuild the Bass
Solo the separated bass stem and you'll usually hear something like a double bass mumbling through a wall. The good news: AI bass lines are almost always simple. Transcribe the part into MIDI by ear — even clicking it in note by note takes minutes, not hours — and hand it to a proper bass instrument. I often reach for EZbass:
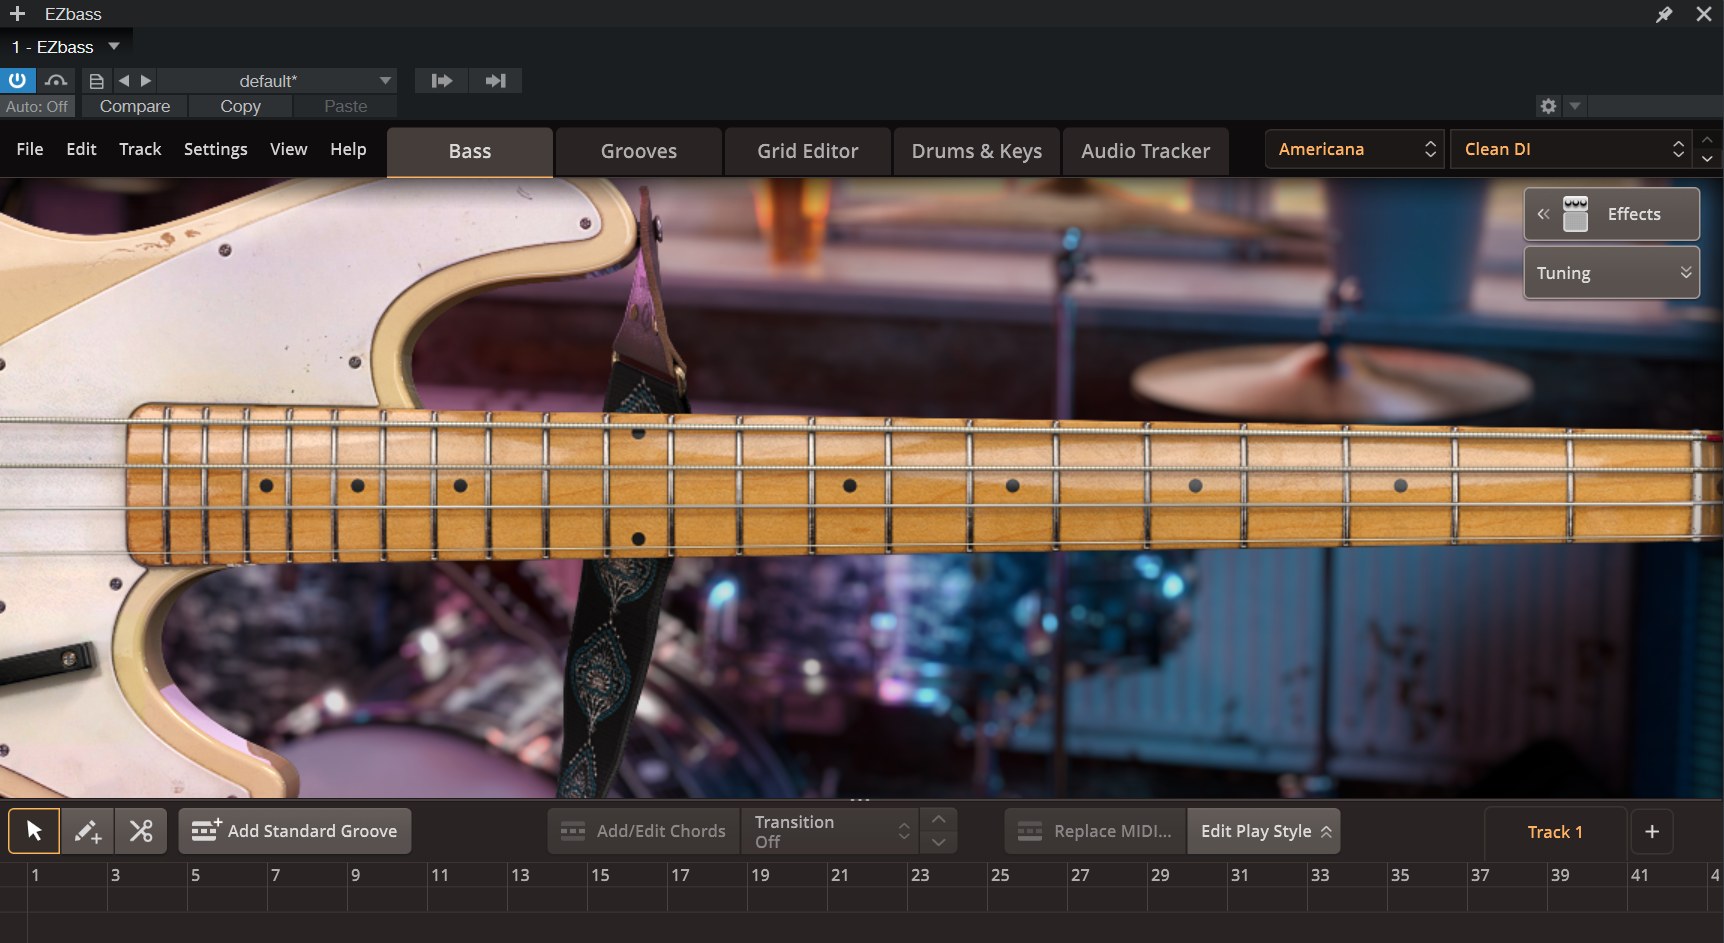
The difference is immediate and brutal: suddenly there are actual notes at 50–100 Hz instead of a warm fog. The kick and bass finally shake hands instead of wrestling in the mud.
Pro Tip
If the new bass feels too clean for the track, don't reach for distortion straight away — tuck the original AI stem quietly underneath. Its blur becomes texture when a real instrument is carrying the notes.
Step 4: The 9 kHz Vocal Trick
You can't re-sing an AI vocal (well — you can, and it's the best possible upgrade, but that's a different budget). What you can do is separate the voice from the fizz. My go-to move: split the vocal at around 9 kHz. Below that line lives the actual voice — body, presence, consonants. Above it, in an AI vocal, lives mostly generation noise: shimmer, hiss, the spectral 'sniffle' that screams synthetic.
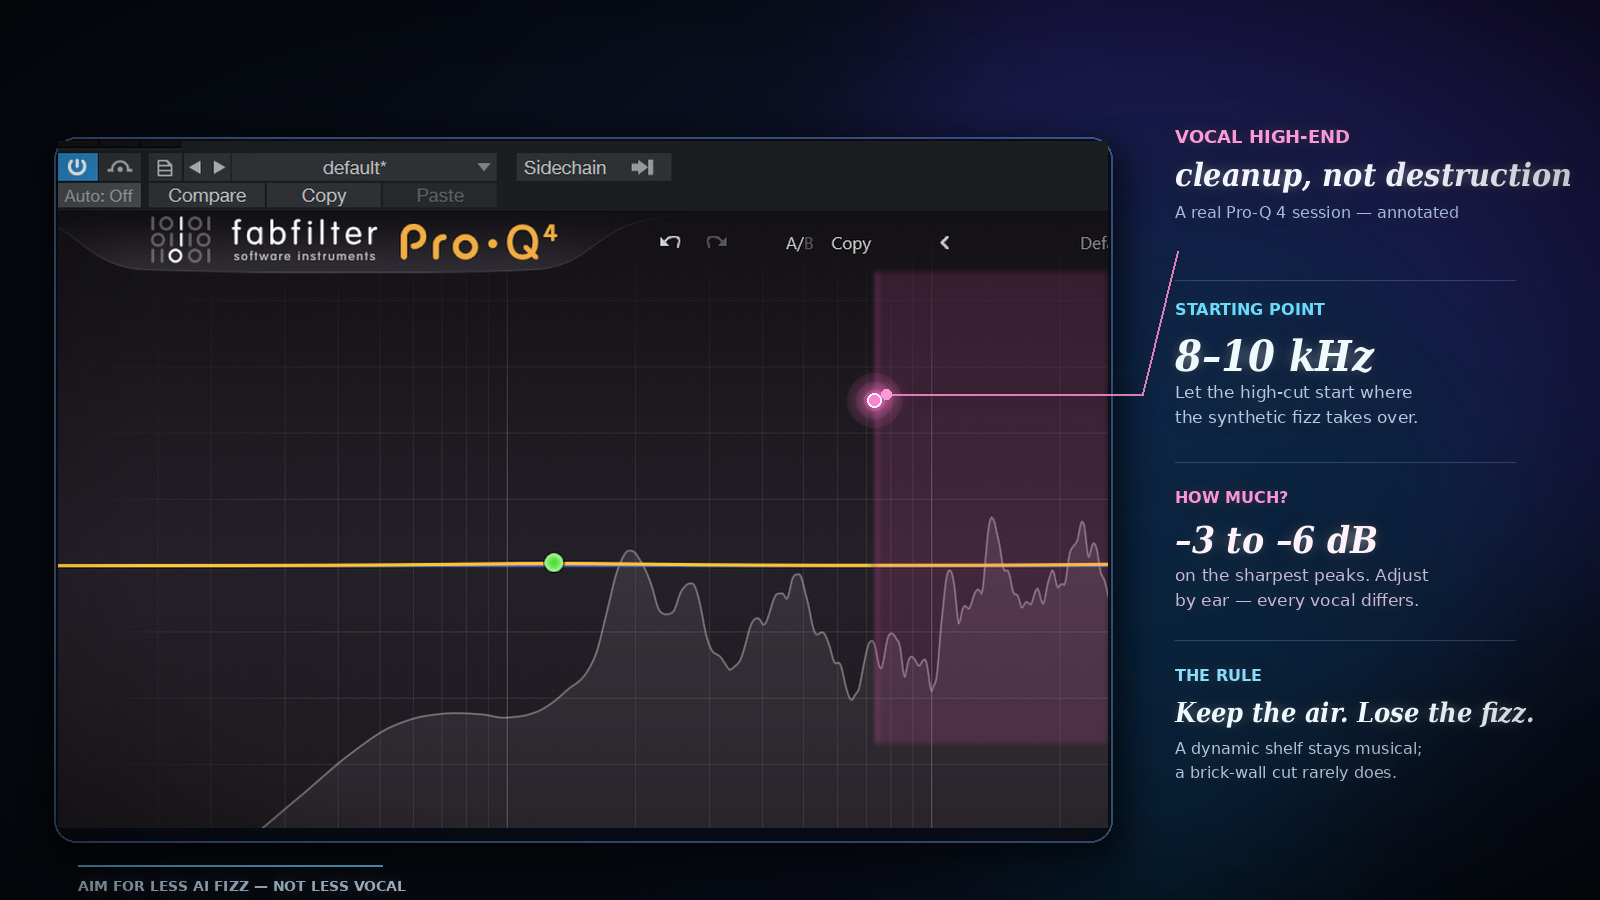
Treat the bottom half like a normal vocal: clean it, de-ess it, EQ it. The top half — cut it, and rebuild the air with a gentle exciter or a filtered noise layer, the same philosophy as the hi-hats. The voice keeps its character; the plastic coating comes off.
Pro Tip
Don't slaughter everything above 9 kHz on autopilot — some consonants carry real energy up there. Automate the cut: harder on sustained notes, gentler on the S's and T's.
Step 5: Two Reverbs, Two Jobs
After all this cleanup your track will sound strangely dry — the original space was baked into the generation, and we just scrubbed most of it off. Resist the urge to fix it with one big reverb; that's how you get a render again. Real productions use two spaces with two jobs: a short ambience (small room, 0.3–0.5 s) that gives the elements a body, and a longer tail (plate or hall, 2–3 s) that gives the track depth. Both on sends, blended under the dry signal:
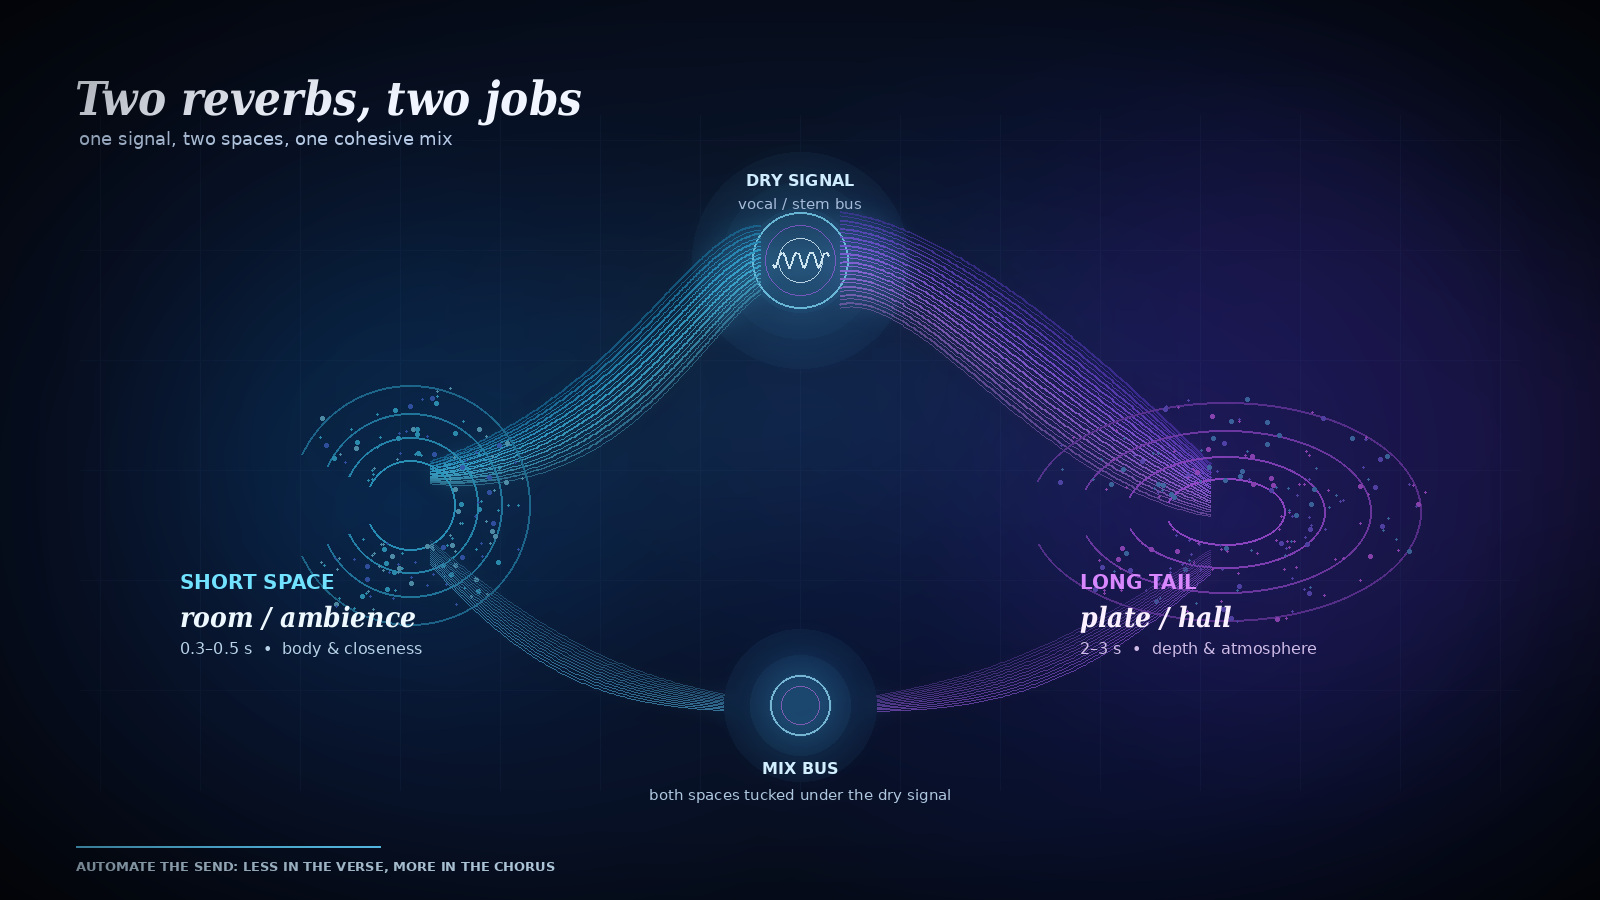
And then the part almost everyone skips: automate the sends. Drier verse, wider chorus, a touch of extra tail on the last word before the drop. Movement is what reads as 'alive' — static reverb is just another way of sounding generated.
Step 6: Put It Back Together
Now it's a normal mix session. Balance the new drums and bass against the surviving stems, glue the mix bus with a light compressor (1–2 dB of reduction, slow attack), and master it — the exact chain, LUFS targets and limiter settings are all in part one. Then do the honest test: A/B the result against the raw generation at matched volume. Same song — different league.
Time check, no sugarcoating: for someone who does this every week, a deep restoration takes a few hours per track. Your first time will take a weekend, and that's normal — you're not slow, you're learning production on a track you already love. Which, frankly, is the cheapest music school there is.
FAQ
Can I restore a track from just the MP3?
Yes. Stem separation works on any stereo file — WAV simply gives the algorithms more to work with, so the stems come out cleaner. If you have a paid Suno plan, always export WAV. If all you have is an MP3 of a generation you love, it's still absolutely worth doing.
Do I have to replace every instrument?
No — and that's the good news. Drums are the widest-band instrument in the mix: kick lives in the lows, snare in the mids, cymbals on top. Replace the drums alone and you mask most of the generation artifacts across the whole spectrum. Bass is the second priority. Everything else is a bonus round.
What if I don't play drums or bass?
You don't need to. Drum replacement is triggering — a plugin detects the hits that are already in the track and fires clean samples in the same spots. Bass parts in AI tracks are usually simple enough to click into MIDI note by note, and instruments like EZbass handle the performance for you.
How long does a deep restoration take?
For someone who does this every week — a few hours per track. Your first time, budget a weekend and treat it as a course in production that costs you nothing but patience. If that's not your idea of fun, handing it to an engineer is exactly what finishing services are for.
Is it still my song after all the replacements?
Yes. The composition, melody, lyrics and arrangement stay untouched — you're re-recording performances, not rewriting the song. Think of it as a cover of your own track, played better. Commercial rights for the generation itself follow your Suno plan, same as before the restoration.
Rather skip the surgery?
This workflow is literally what I do for clients: stems, real drums, rebuilt bass, vocal cleanup, mix and master. Free processed preview before you pay anything.
Suno Track Finishing →Made a track in Suno? I'll finish it to release quality — from $39.
Want your track to sound like this?
Send it in and get a free preview — hear the difference on your own song before you pay anything.
Get a free preview →