Suno AI Part 2: Suno Studio — Complete Guide for Musicians
Part one was about not gambling with generation. This one is about what you do after. Suno Studio is the working layer between hitting Generate and opening your DAW. We're going through all of it.
Who this guide is for
For anyone who's made a few tracks in Suno and felt something like: "this is kind of great, but why am I not in control of any of it?" For musicians who need a predictable outcome, not a coin flip. And for everyone who's ever rage-closed a browser tab because the AI sang the wrong thing for the tenth time in a row. That's fixable.
Haven't read Part 1 yet? Start with Suno AI: Complete Guide — Genres, Tags & Prompts 2026.
Contents
- 01.What Suno Studio is — and what it's NOT
- 02.The Timeline — your main instrument
- 03.Extend — the button that turns ideas into songs
- 04.English tags for Extend
- 05.The G.M.I.V. Formula — prompts like a pro
- 06.Cover & Replace — surgical fixes
- 07.The Mixer — draft mode, not the finish line
- 08.Export — the final step with hard rules
Three stages of the kitchen
Suno Studio is a deliberate middle stage. Not a replacement for your DAW, not an extension of Generate. It has its own role in the chain.
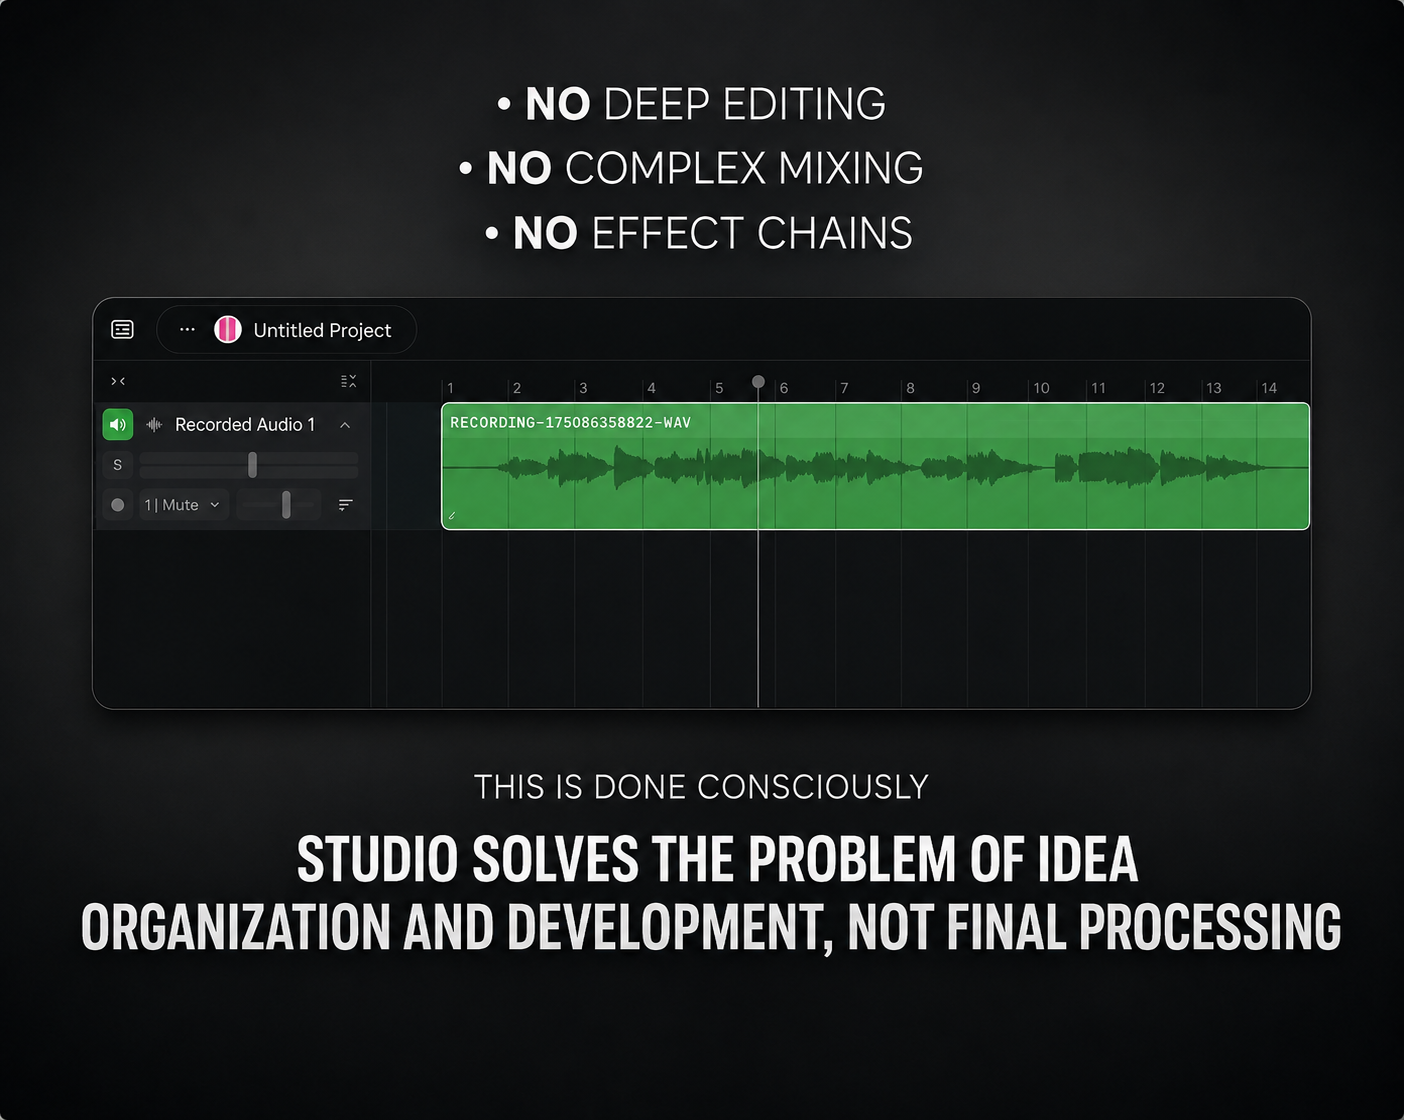
What Suno Studio is — and what it's NOT
Let's get one thing straight before any disappointment sets in. Suno Studio is not a continuation of the Generate button, and it's not a replacement for it either. It's a separate working stage — one that lives exactly between "hit Generate, get something" and "open it in a real editor."
Generate
Creates raw material. A pencil sketch on a napkin. The idea that still needs to become something.
Studio
Organization and development. The director's table — you can see the structure and make real decisions.
DAW
The finish line: mixing, mastering, polish. The final manuscript after the editor.
Studio deliberately doesn't copy a DAW. There's no deep audio editing here, no complex effect chains, none of the arsenal a sound engineer lives in. That's not a bug — it's a feature. Studio has a different job: organizing and developing the idea.
Without Studio, generation stays a collection of lucky and unlucky attempts. With it, something important appears: you can pause on the good moments, extend your track with intention, and stop starting from scratch every single time. For musicians and producers, this is above all a time saver — what you bring into your DAW isn't a raw random result, it's an already-structured piece.
The Timeline — your main instrument
At the heart of Suno Studio is the timeline. Not the buttons, not the menus — the timeline. It's the strip of time where all your music unfolds.
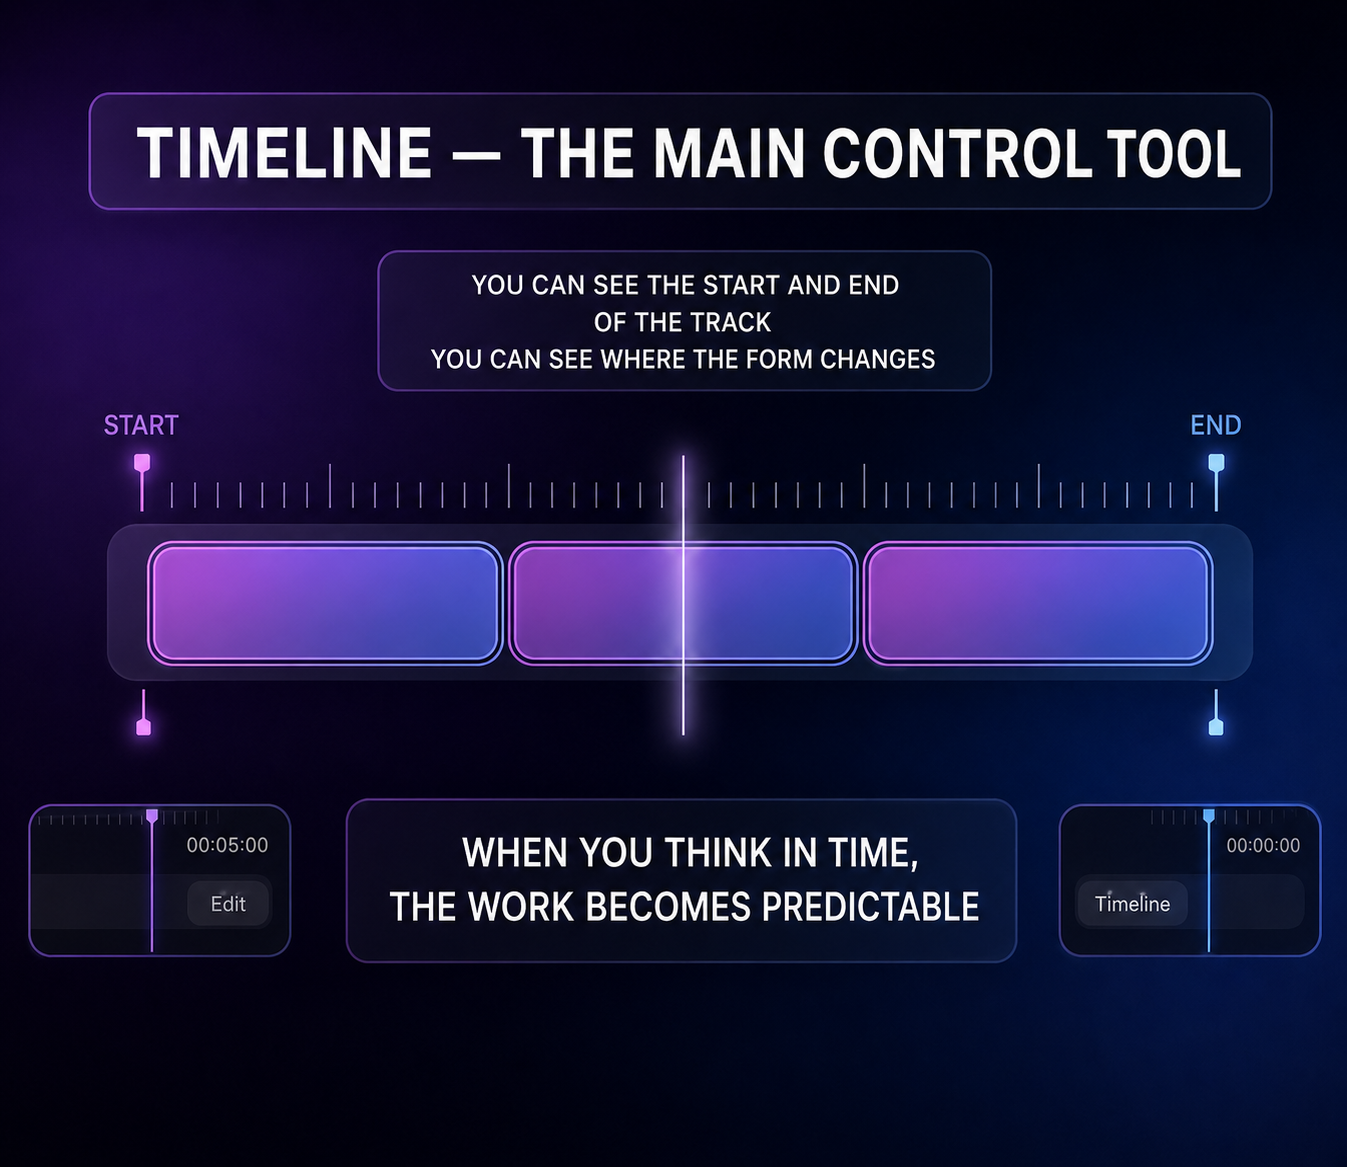
What you see on it: the shape of the whole track, the clips and layers, the transitions between sections. The most important shift — you stop perceiving the track as one big audio file. You start seeing a collection of parts that can be analyzed and developed individually.
🔭 Wide view
See the full shape of the track and judge the overall arc. Does the idea actually work?
🔬 Close view
Examine transitions, pauses, edit points. Where exactly should you set the Extend timestamp?
Use both views. Without the wide one, you can't tell if the idea holds together. Without the close one, you won't find the right place to extend. Once you start thinking in timelines, everything becomes predictable.
Extend — the button that turns an idea into a song
If Create gives you the idea, Extend is what turns it into a full track. It's the most powerful tool in Studio — and the one most consistently misused.
What the model hears when you press Extend
"Listen to the last few seconds of this section, understand the context, and figure out what should come next. Preserve the key and BPM."
Simple enough — but every detail matters.
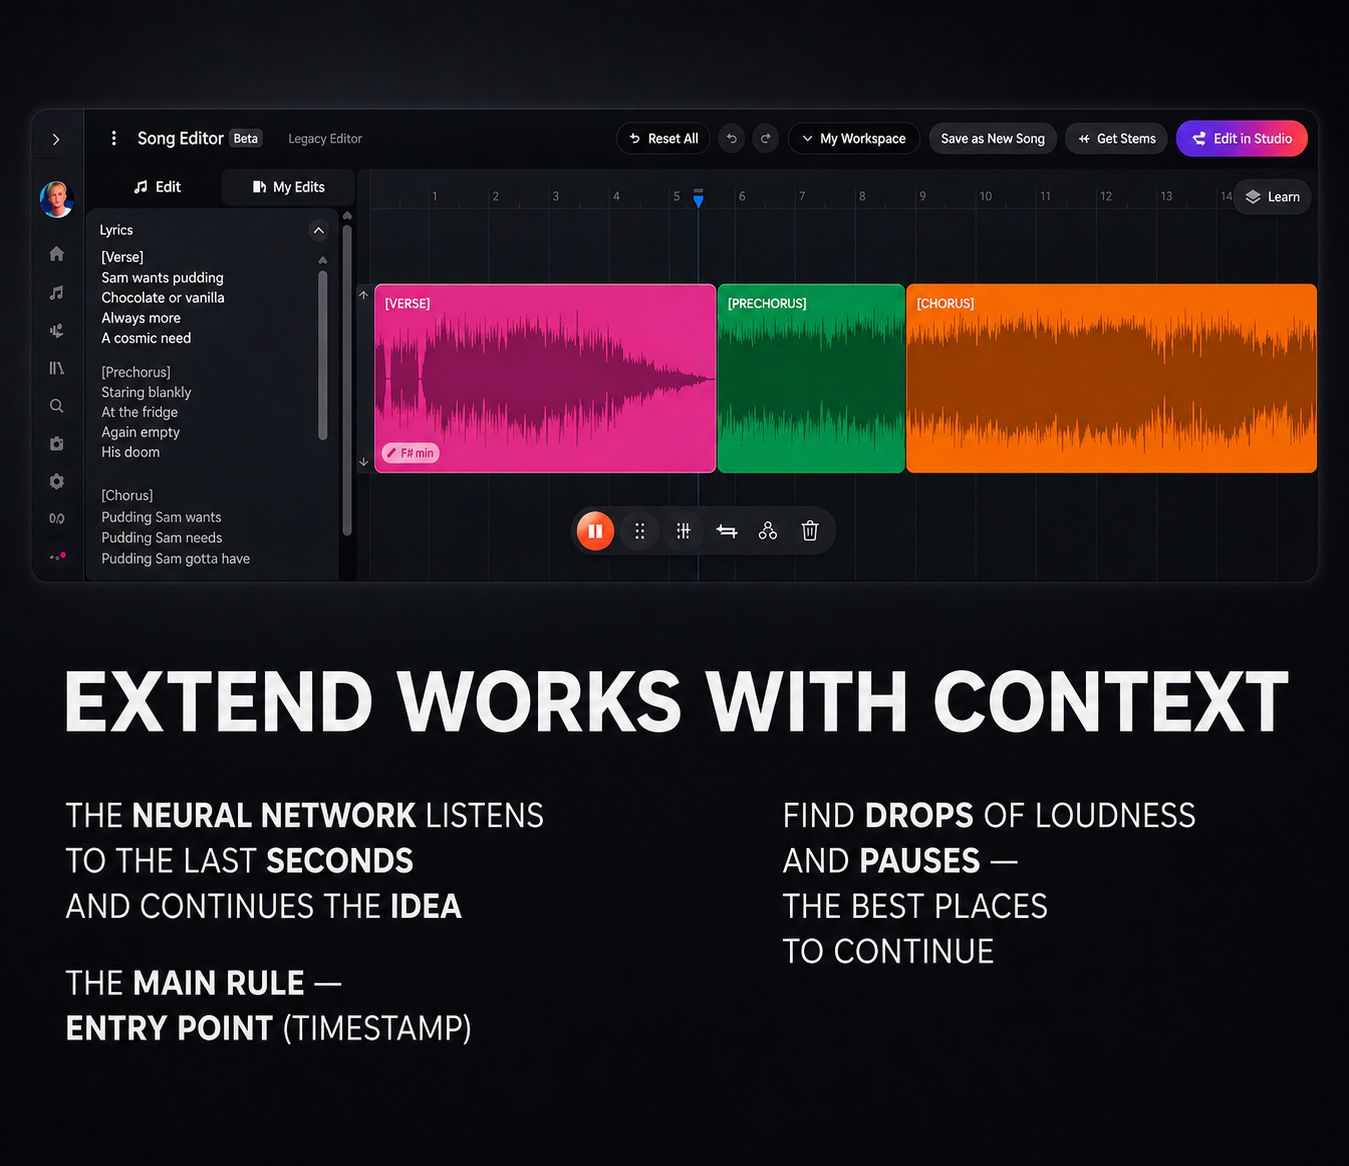
The one rule: the timestamp
The most common beginner mistake is pressing Extend wherever. The result: the track falls apart — the voice changes, the rhythm breaks, the song wanders off somewhere nobody intended.
🚫 What not to do
- → Cut in the middle of a word — the model will hallucinate
- → Pick a random spot without reading the waveform
- → Press Extend without updating the Lyrics field
✅ What to do instead
- → Find the end of a bar
- → Find where the reverb tail fades out
- → Find the pause after a chorus
Pro Tip
Look at the waveform on the timeline and find the visual dips in loudness — those are your ideal cut points. Where it goes quiet, that's where you cut. This rule applies in Suno Studio, in your DAW, and in editing generally.
Block logic: Part 1 → Part 2
In Studio you see a chain: Part 1 → Extend → Part 2. One rule to remember:
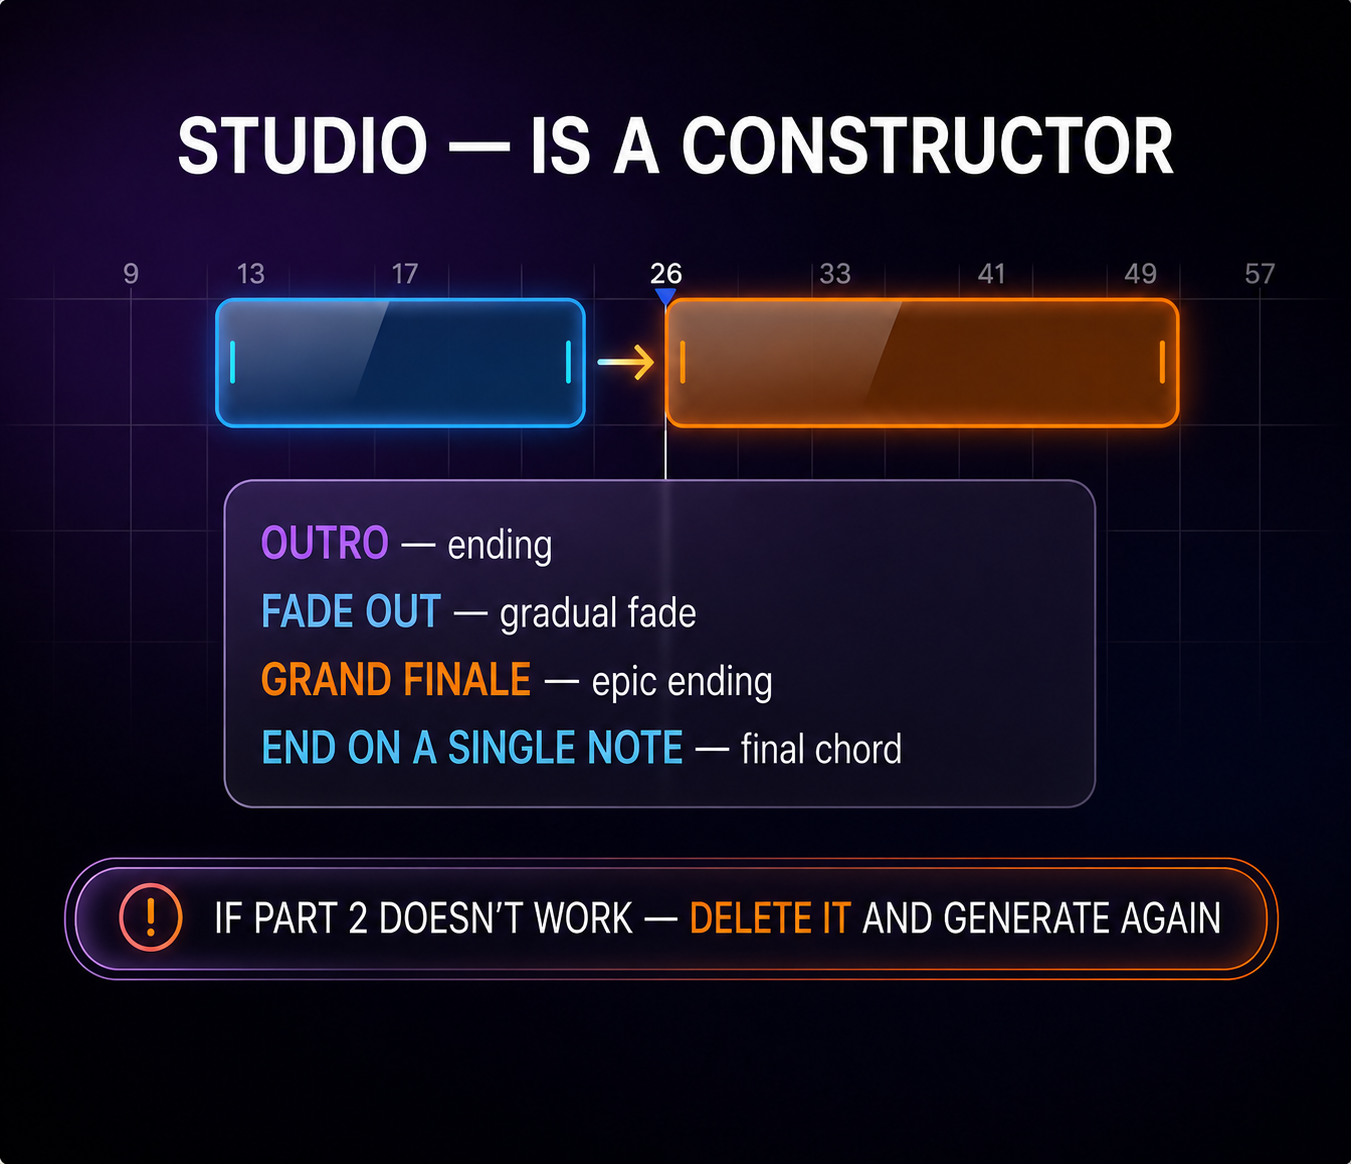
The block rule
If Part 2 isn't working — don't try to fix it with another Extend. Delete it and regenerate from the end of Part 1. If a part comes out wrong, we don't sand it down forever — we get a new one.
Checklist before pressing Extend:
Is the timestamp right — no mid-word cuts?
Has the old Lyrics text been cleared and replaced with something new (or at least a [Instrumental] tag)?
Is the Style field filled with English descriptors?
The G.M.I.V. Formula — prompts like a pro
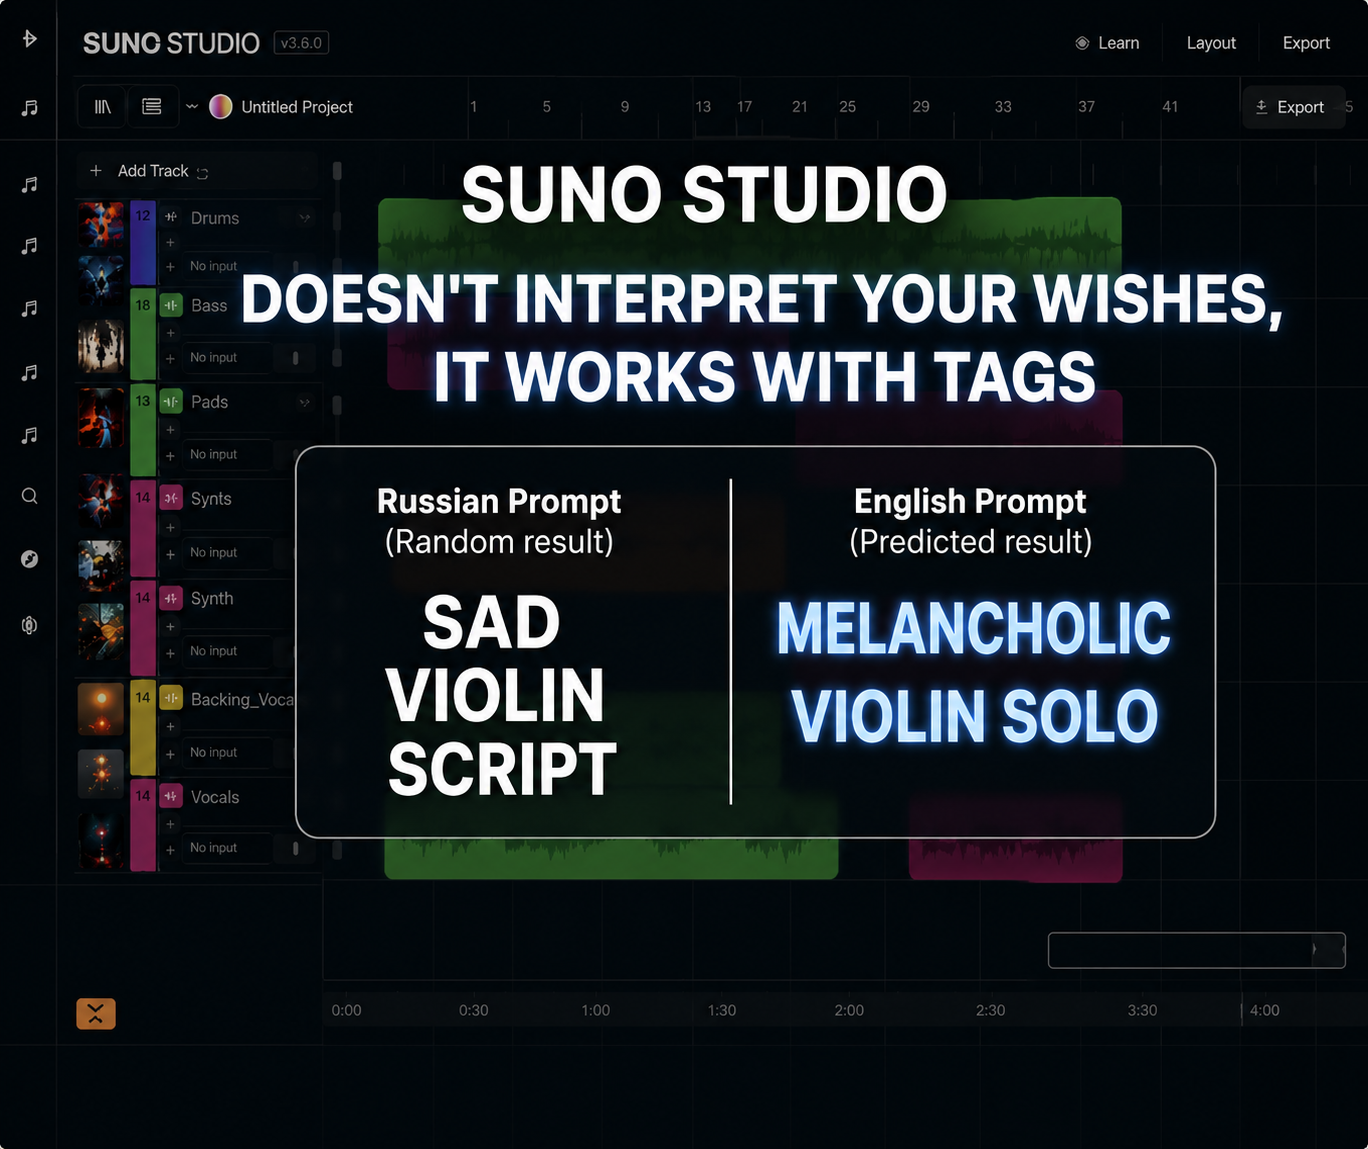
Before the formula, one principle to internalize: Suno doesn't interpret your feelings — it works with tags. Write a prompt like a beautiful book description — you get randomness. Write it like a technical spec — your results become predictable.
Hard rule: write prompts in English. Even if your song is in another language, the Style of Music field must be in English — that's the data Suno trained on. "Sad violin" — Suno gets the gist, with margin for error. Melancholic Violin Solo — understood precisely. The difference between "bring me something to eat" and "oat milk cappuccino, medium, extra shot."
The G.M.I.V. formula — four components
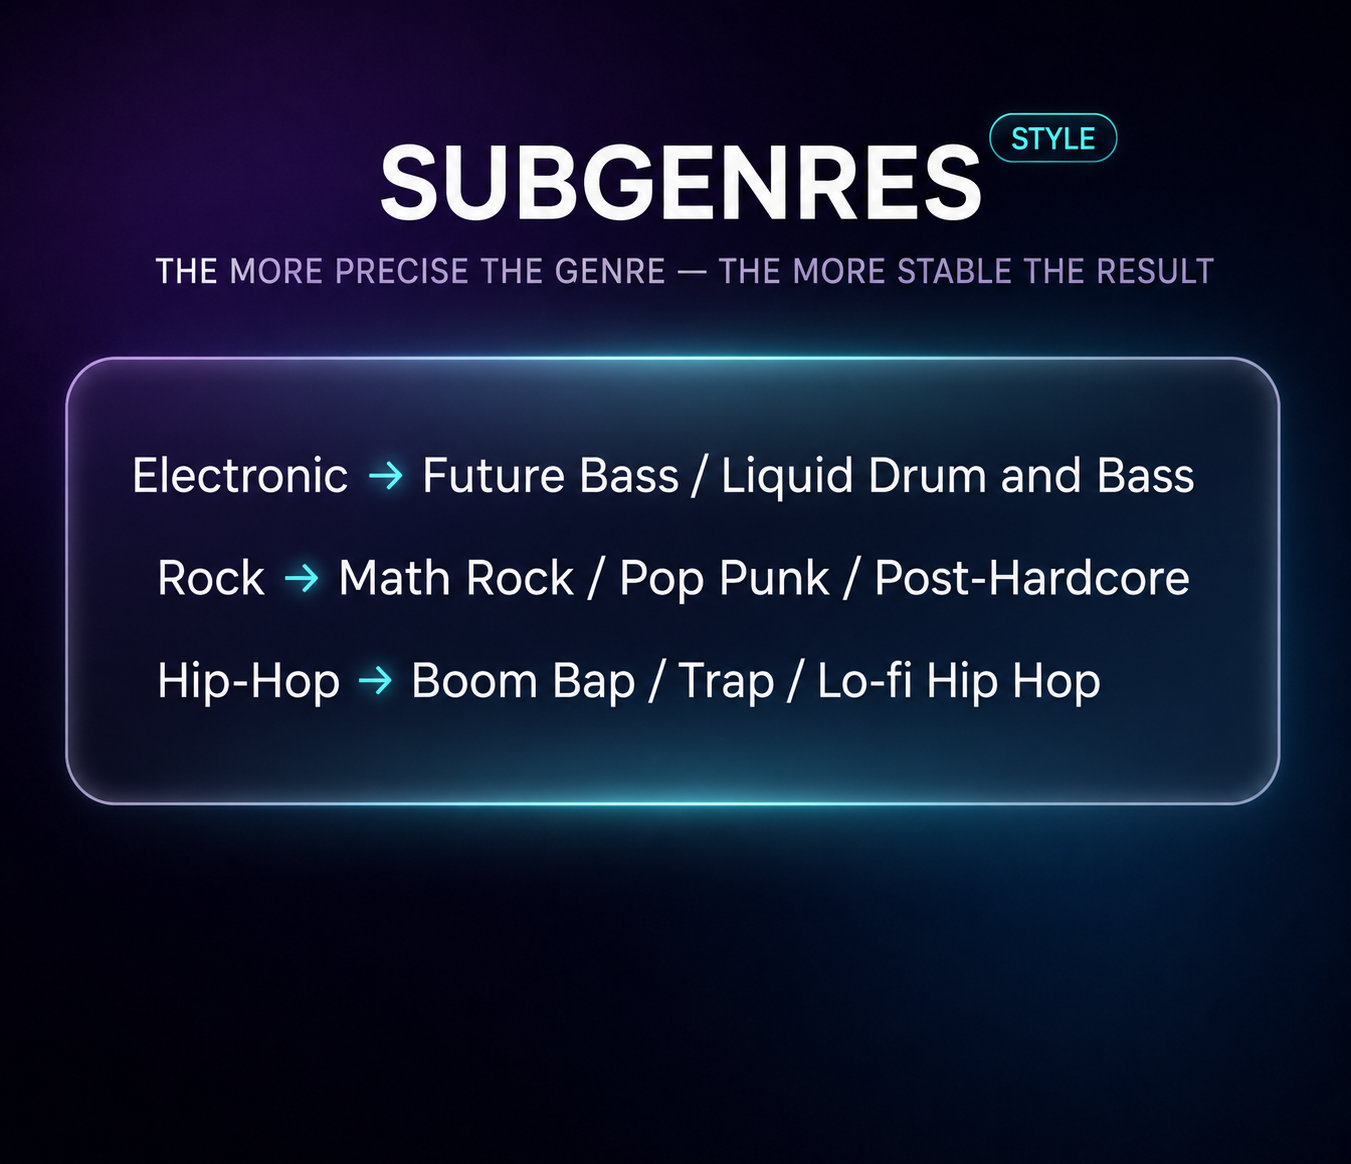
G — Genre
Don't just write Rock or Pop. Use subgenres — they narrow the search space and produce consistent results:
| Instead of… | Write… |
|---|---|
| Electronic | Future Bass / Liquid Drum & Bass |
| Rock | Math Rock / Pop Punk / Post-Hardcore |
| Hip-Hop | Boom Bap / Trap / Lo-Fi Hip Hop |
M — Mood
Beginners describe how they feel instead of using musical descriptors. The model doesn't need to know what you're feeling — it needs the atmosphere in technical terms:
"soulful"
Ethereal
"angry"
Aggressive
"joyful"
Euphoric
"dark"
Dark
I — Instruments
Name exactly what should be playing. This gives the track its substance:
V — Vocals
Leave it unspecified and Suno picks randomly. Take control:
G.M.I.V. Prompt Builder
Выбери теги — промпт соберётся автоматически
Готовый промпт
← Выбери хотя бы один тег слева
✕ Weak prompt
"Beautiful love song with piano, kind of sad"
This is a wish. Suno guesses.
✓ Strong prompt
RnB, Soul, Sentimental Mood, Grand Piano, Minimal Drums, Female Emotional Vocals, Slow Tempo, 80 BPM
This is a spec. Suno executes.
Pro Tip
Suno responds better to comma-separated tags than to full sentences. Bad: "Make a song that sounds like it is raining outside." Good: Rainy atmosphere, Lo-Fi. Short, clear, precise.
Cover & Replace — surgical fixes without the pain
Great track, but the vocalist swallowed a word in the middle or the drums drifted off-beat. The old answer was to regenerate everything from scratch. In Studio, you fix it precisely. Two tools, two different jobs.
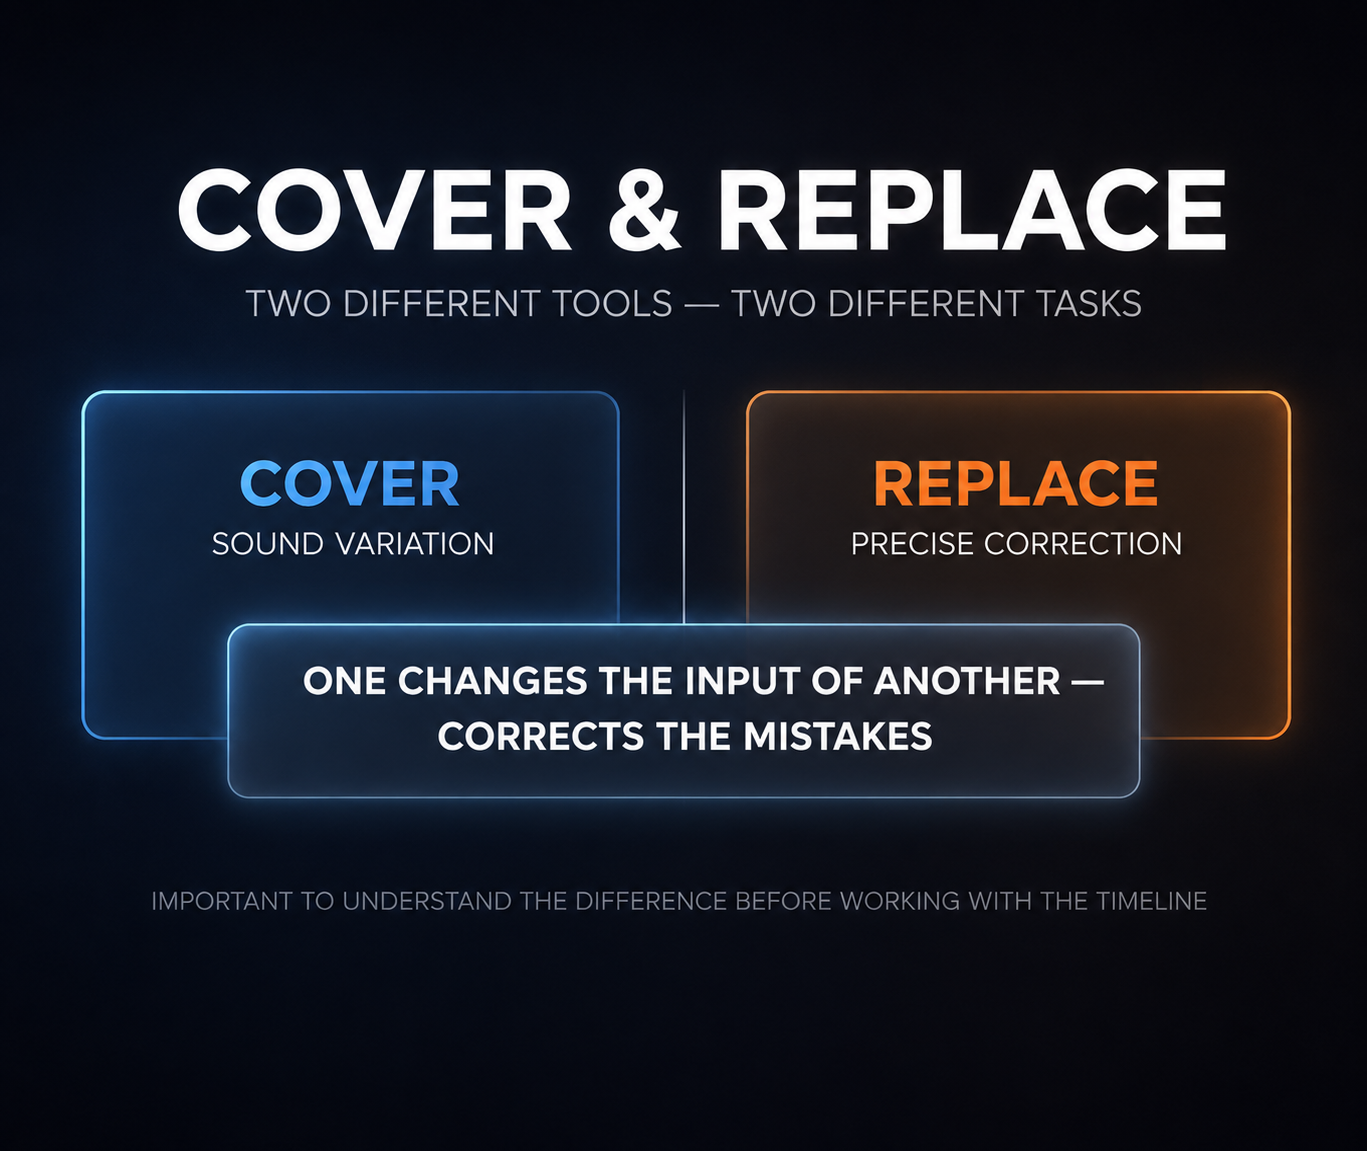
Cover — Variation
Use this when you love the melody but not the sound. For example: the chorus melody is perfect, but it's played on piano and you want guitar. Select the section, hit Cover, swap the instrument in the prompt. Suno will attempt to "drape" the new sound over the existing notes.
Replace — Context-aware substitution
The most powerful tool in Studio — and the one beginners most often overlook. Use this when the musical phrase itself is wrong, or there's an actual error.
How it works: Suno doesn't listen to what's inside the selection. It listens to what comes before and what comes after — and generates a bridge that joins those two pieces seamlessly. It's close to magic.
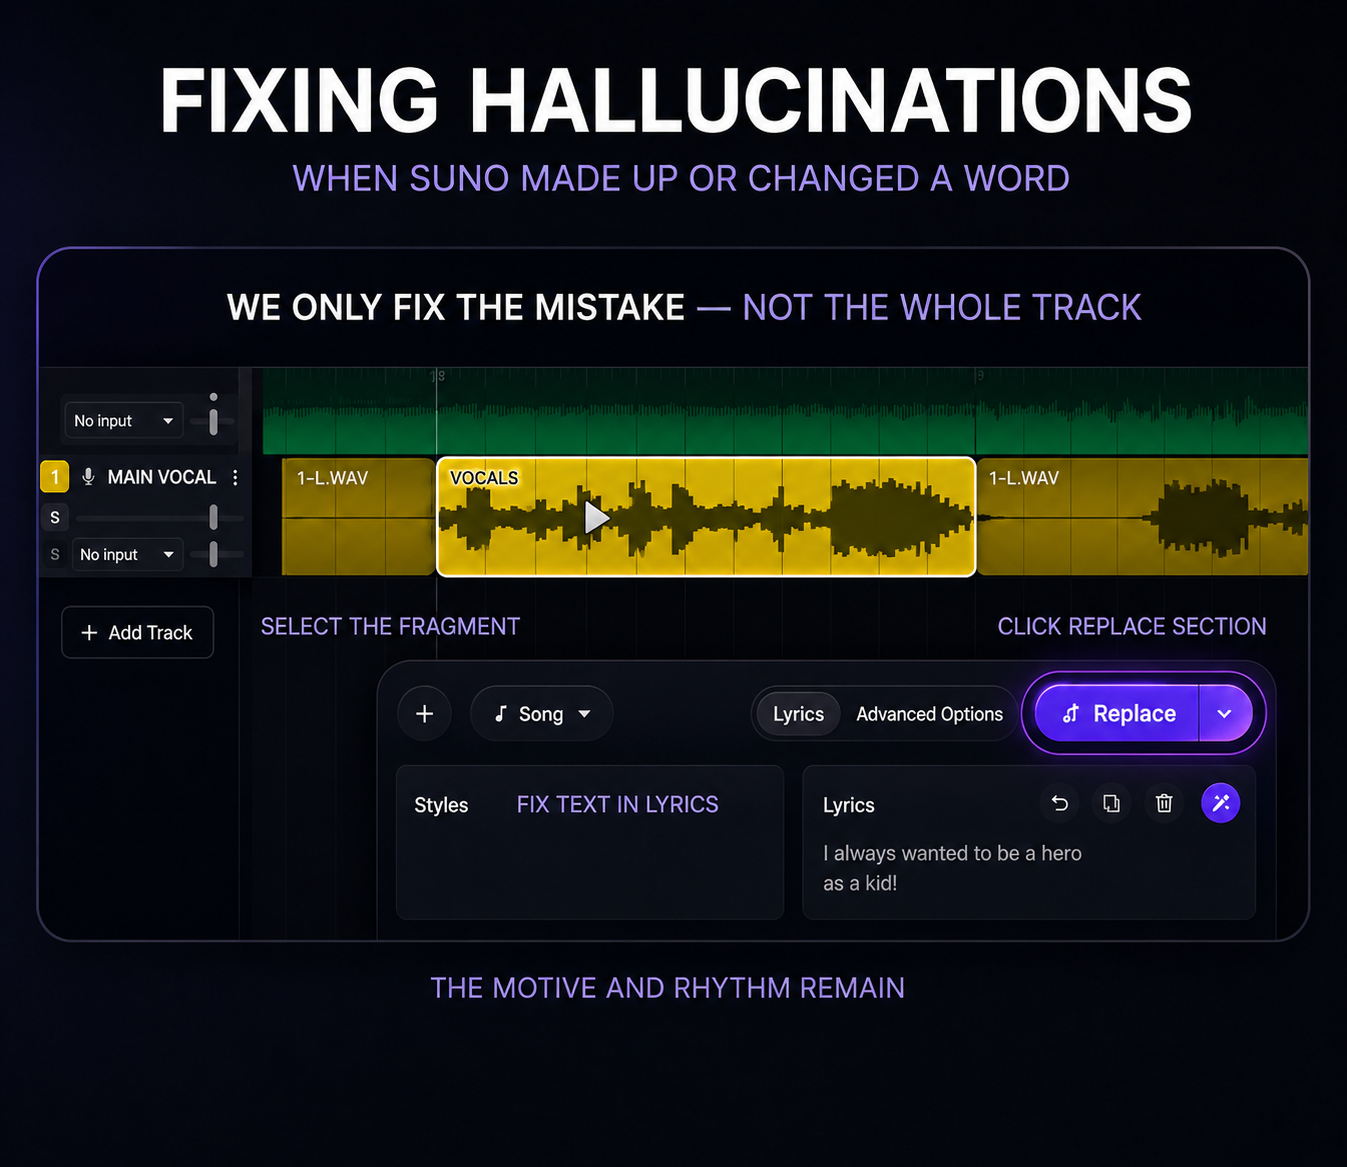
How to fix hallucinations
Hallucinations are when Suno sang an extra line, mangled a word, or inserted something completely unexpected. Don't throw the track away. Do this instead:
Select exactly the section with the error
Grab a small amount of clean audio on each side — that's the context.
Click Replace Section
Not just Replace — specifically Replace Section.
Fix the text in the Lyrics field
Correct only the line where the error occurred.
Hit Create
The model re-sings just that section, preserving the melodic and rhythmic feel of everything around it.
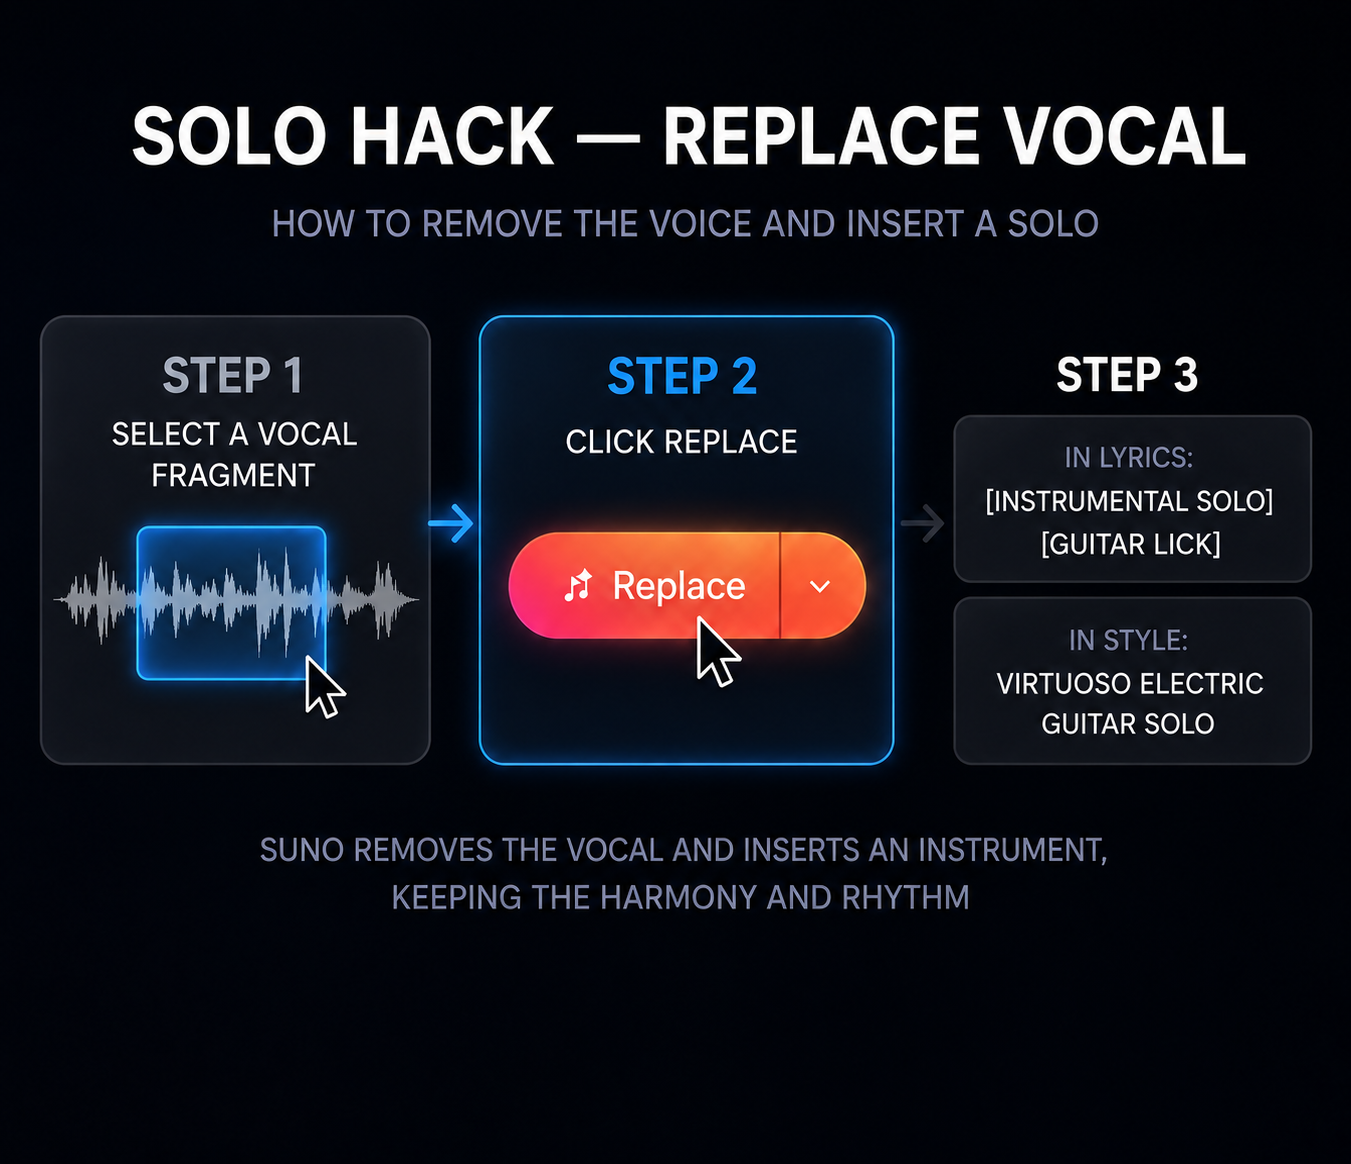
Solo Hack: pull the vocals and drop in an instrumental
A pro move. Common situation: you want a guitar solo after the chorus, but Suno stubbornly keeps singing more verses. Here's the fix:
Select the vocal section you want to remove
Click Replace
In the Lyrics field: [Instrumental Solo] or [Guitar Lick]
In the Style field: Virtuoso Electric Guitar Solo
The core shift: in Studio we stop being generators and become editors. We don't hope randomness gets it right — we correct it when it doesn't.
The Mixer in Studio — draft mode, not the finish line
A lot of people see the volume faders in Studio and think: "finally, I'll mix the track right here." Let's take the rose-tinted glasses off: the built-in mixer is a tool for checking your idea, not for achieving final quality. But there are a few genuinely useful things you can do with it.
The golden rule of volume
Feel like the instruments are too quiet under the vocal? Don't turn them up. Do the opposite — turn the vocal down. In mixing, it's always better to pull back the loudest thing than to try and compete with it. This rule holds everywhere: in Studio, in your DAW, in life.
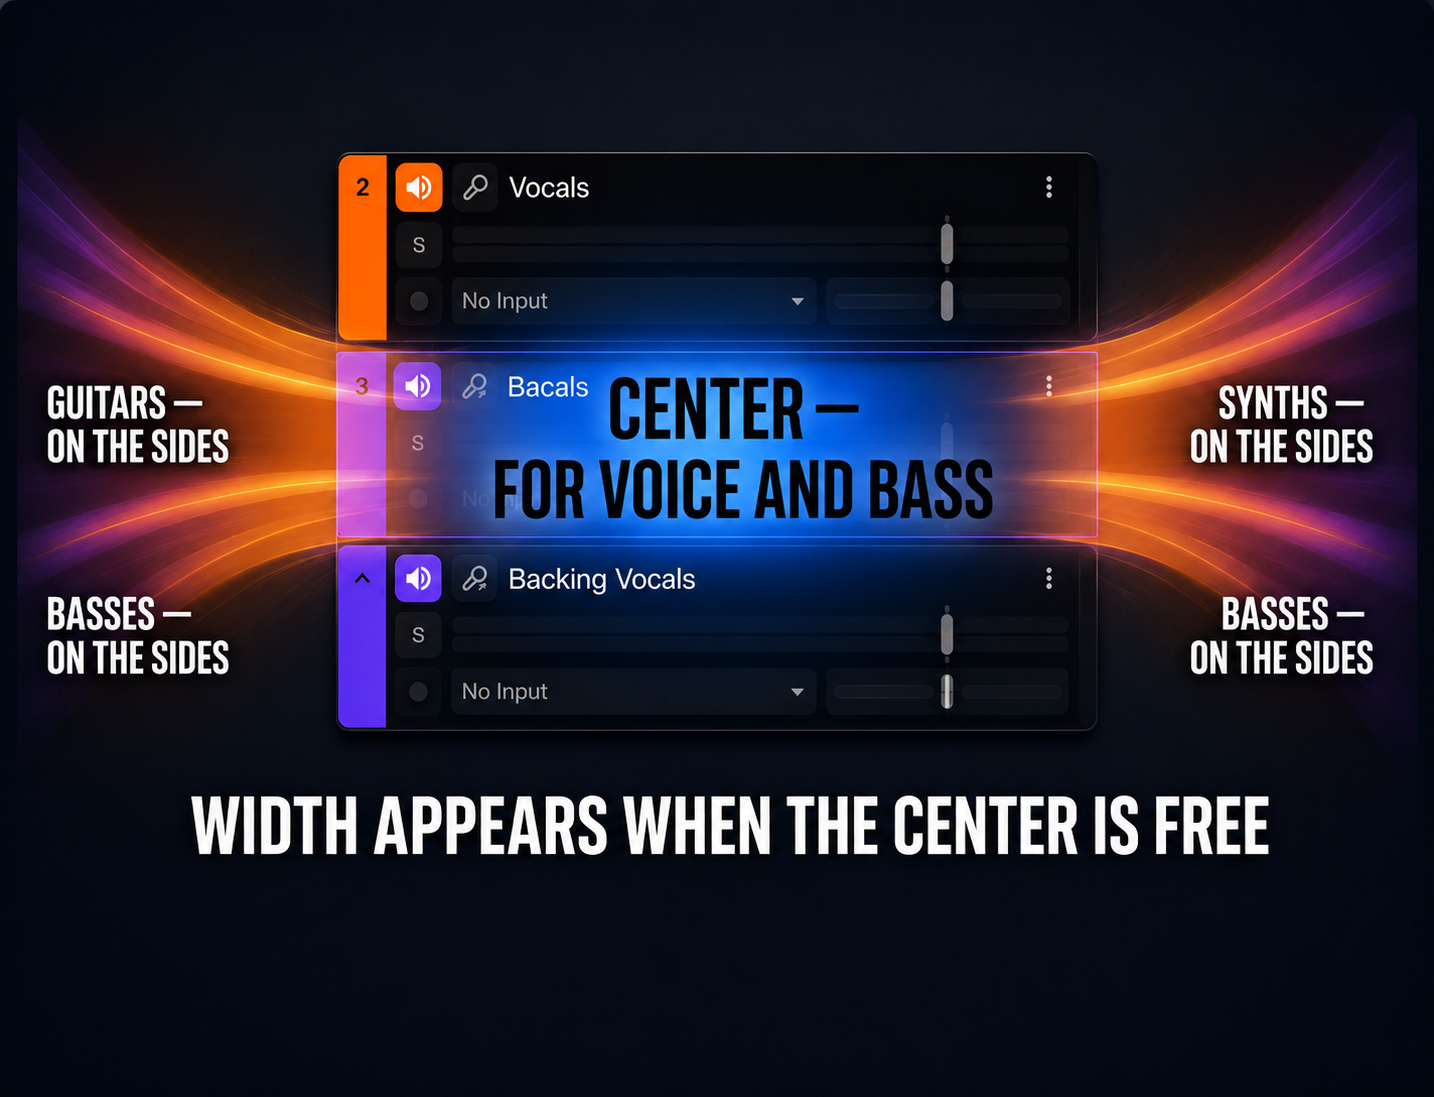
Pan: free up the center
The center of the stereo field is sacred space for the vocals and bass. Leave those alone. Everything else — guitars, synths, backing vocals — push to the sides. One instrument left, another right. This gives the track width and carves out space for the lead vocal to breathe instead of drown.
Pro Tip
The Studio mixer is for orientation, not the finish line. If something sounds wrong here — treat it as a signal to revisit the structure, not a reason to spend an hour tweaking faders. The final sound is born in professional mixing.
Export — the final step with hard rules
We made it to the end. A few rules here that, if broken, cost you quality — sometimes significantly.

⚠️ Why you can't only hand over Full Song
Think of Full Song as an already-baked cake. A mixing engineer can try to "unbake" it with specialized software — but that's extra work, and the quality inevitably takes a hit. Why accept a result with artifacts and smearing when you could just hand over the clean individual ingredients to begin with?
Export Multitrack (Stems)
In the Export menu, always choose Multitrack (Stems). Suno will give you an archive with every instrument on its own track: Vocals, Drums, Bass, Instruments. Give your engineer two things: Full Song (so they can hear the vision) and Multitrack Stems (so they can work on the parts). Only with separate tracks can a professional clean up the noise and assemble something truly polished.
WAV only — forget MP3 exists
MP3 is a compressed format for rough drafts and streaming. In the Audio menu, select WAV only. Suno already bakes in digital noise during generation — MP3 compression will amplify it. We want the cleanest possible source file for everything that comes next.
Note the BPM — before you close the browser
Look at the BPM displayed at the bottom of the screen and write it down. When you open your DAW, set that exact tempo first — then import the files. That way the rhythmic grid aligns perfectly and the stems sit exactly where they should.
Quick reference — the whole guide on one card
| Задача | Инструмент |
|---|---|
| Build a track structure | Timeline |
| Extend with intention | Extend + correct Timestamp |
| Write a prompt that works | G.M.I.V. Formula |
| Change the sound, keep the melody | Cover |
| Fix a single error surgically | Replace |
| Pull vocals, insert an instrumental solo | Solo Hack |
| Prepare files for your DAW | Stems + WAV + BPM |
Suno Studio doesn't make music for you. It gives you an environment where you make the decisions. The better you understand what's controllable here — the more predictable the result.
Pre-export checklist
Нажми на каждый пункт чтобы отметить выполненным
You're no longer just a user
What's sitting on your drive now isn't a file — it's a disassembled project, part by part. You're no longer the person who hits Generate and prays. You're a producer with clean stems ready for a serious mix.
Timeline, Extend with the right timestamp, the G.M.I.V. formula, Cover and Replace, stems in WAV — this isn't a feature list. It's a workflow where every step is deliberate.
Go make something.
Stems ready — what's next?
Send over the stem archive or Full Song. We'll take it to release-ready. First consultation is free.
Get in touch →